It's more complicated on an Atlas than on an English-design lathe with nice decent T-slots on the backside of the cross-slide -- but with less than 2 inches of swing over the cross-slide, that probably isn't very useful. But being able to line-bore stuff can be convenient, especially if you need a hole that's exactly concentric with the headstock.
To make my line-boring setup I used a piece of random round stock with an OD just a shade smaller than the largest hole I feel like drilling using a twistdrill. I marked and center-drilled both ends, turned the length between centers, then drilled through with a 1/8" drill in the middle of the bar, and drilled into that hole at a 90 degree angle. The angle hole was tapped for an 8-32 setscrew, and the through-hole was expanded to the diameter of a trashed old drillbit I had sitting around. I took the old drillbit, ground the end to a roughly 60 degree V, then ground half of that away to form a 60 degree cutting edge at the center of the drill. I hardened and tempered this, then cut it off with a dremel to the diameter of the boring bar. It's much easier to do the grinding and hardening when it's on a nice long shank.
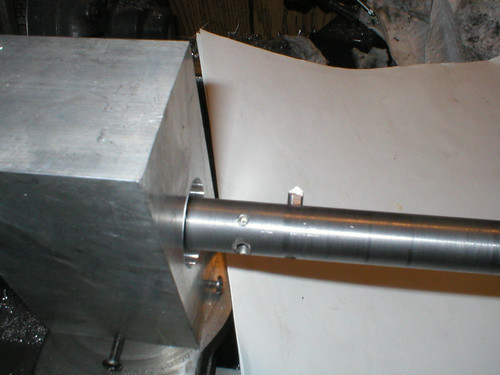
You can see it peeking out here.
There are two boring holes in this boring bar. The one visible at the bottom is for boring holes that are almost exactly the same diameter as the bar. I found it helps tremendously to remove the metal of the boring bar above the cutting face. Otherwise, the space clogs with chips. The boring hole that the cutting tip is located in right now has the back half of the hole tapped for another 8-32 setscrew so I can precisely advance it after each pass. There was no space for that in the close-clearance boring hole. It is possible to make an external screw gauge to measure and control the extension of the cutting point.
Sorry for the lousy focus: here's an action shot.
This page written 24 Jan 2010, last modified 2May 2023